The Definitive Guide to Installing and Configuring PostgreSQL on Arch Linux (2025 Model)

PostgreSQL, often referred to simply as Postgres, is globally recognized as the most advanced open-source Relational Database Management System (RDBMS). Its robustness, extensibility, and strict adherence to SQL standards make it a preferred choice for high-integrity applications. A key advantage of Postgres is its platform independence, allowing seamless deployment across various operating systems, including Windows, macOS, and different Linux distributions.
This comprehensive guide is dedicated to users of Arch Linux, a highly flexible and lightweight distribution, providing precise instructions for the installation, initial configuration, and maintenance of the PostgreSQL server.
PostgreSQL Installation and Verification on Arch Linux
Installing PostgreSQL on Arch Linux is streamlined through the native Pacman package manager. Follow these sequential steps to ensure a clean installation:
Step 1: Update System Repositories
Before initiating any software installation, it is crucial to synchronize and update your local Pacman package database to ensure you install the latest versions and avoid dependency conflicts. Execute the command below:
sudo pacman -Syu
Step 2: Install the PostgreSQL Package
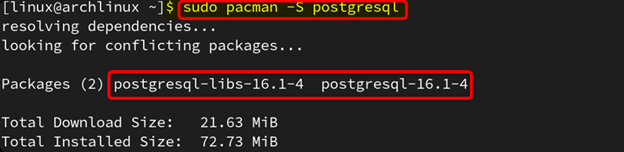
Use the `pacman -S` command to instruct the package manager to download and install the official PostgreSQL package from the configured repositories:
sudo pacman -S postgresqlThe system will prompt you to confirm the installation and dependency resolution.
Step 3: Verify the Installation
To ensure that the PostgreSQL binary (`psql`) is correctly installed and accessible on your system's PATH, check its version using the following command:
postgres --versionThe successful display of the version number (e.g., "16.1") confirms a successful installation:

Configure and Initialize the PostgreSQL Server
The package installation provides the binaries, but the server needs initialization before it can run. This configuration involves switching users and creating the core database cluster.
Step 1: Switch to the PostgreSQL User
Database management operations, especially initialization, must be performed by the dedicated system user (`postgres`) created during the package installation. Switch user context using the following command:
sudo -iu postgresYour terminal prompt should change, confirming the user switch:

Step 2: Initialize the Data Directory
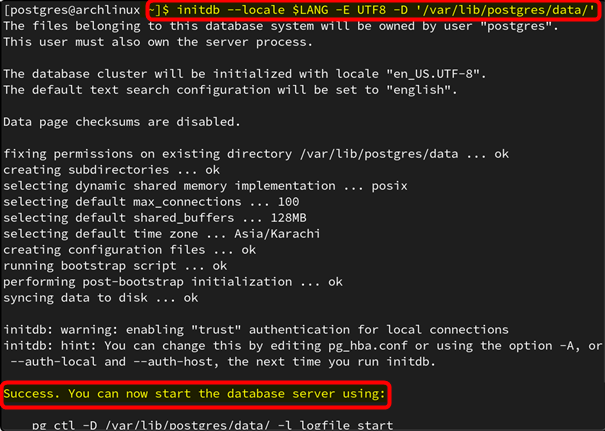
The `initdb` command creates the PostgreSQL database cluster—the collection of databases, metadata, and configuration files—in the specified directory. This step must only be done once.
initdb --locale $LANG -E UTF8 -D '/var/lib/postgres/data'This command initializes the cluster using the system locale, UTF8 encoding, and places all data files in the default Arch location, `/var/lib/postgres/data`.
Step 3: Enabling Data Checksums for Integrity (Highly Recommended)
For enhanced data integrity, you should initialize the cluster with data checksums enabled. Checksums provide an extra layer of protection by verifying data consistency at the storage level, immediately detecting corruption caused by hardware failure or disk issues.
You can check if checksums are currently enabled (they are disabled by default) using `psql`:
psql --tuples-only -c "SHOW data_checksums"If the output is `off`, the feature is not active.

To initialize the data directory with checksums enabled, you must run `initdb` again, including the `--data-checksums` argument. Note: This must be done on an uninitialized data directory.
initdb --locale $LANG -E UTF8 -D '/var/lib/postgres/data/' --data-checksums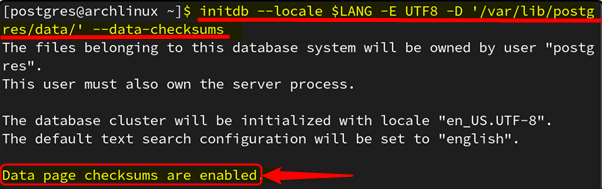
Managing the PostgreSQL Service with systemctl
After initialization, the server is managed by systemd on Arch Linux. Use `systemctl` to control the service lifecycle.
Step 1: Start the PostgreSQL Server
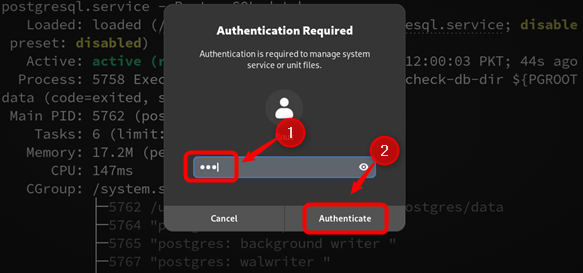
Execute the command to start the service. You may need to provide your system password for authentication via a pop-up window (if using a desktop environment) or directly in the terminal.
sudo systemctl start postgresql
Depending on your setup, a prompt may appear:
Step 2: Check the Service Status
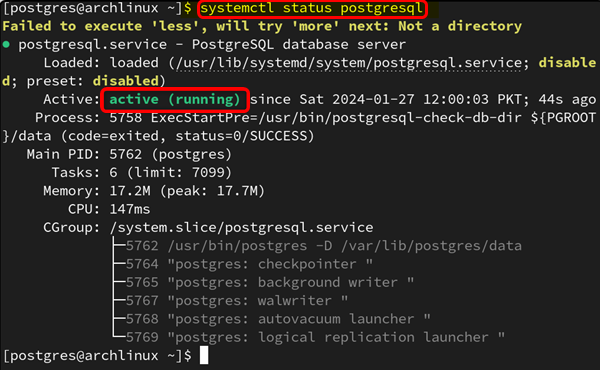
Verify that the service is running correctly using the `status` argument:
systemctl status postgresqlThe output should clearly indicate the server is active (running):
Step 3: Enable Automatic Startup (Essential)
To ensure PostgreSQL starts automatically every time your Arch Linux system boots, you must enable the service:
sudo systemctl enable postgresql
Accessing the psql Interactive Terminal
Once the server is running, access the psql terminal to begin database operations. You must execute this command as the `postgres` system user:
sudo -u postgres psqlThe successful appearance of the `postgres=#` prompt confirms access to the interactive SQL terminal, where you can execute all DDL and DML commands (e.g., `CREATE TABLE`, `CREATE DATABASE`, `DROP USER`, etc.).

Uninstalling PostgreSQL from Arch Linux
If you need to completely remove PostgreSQL along with its configuration files and dependencies (the recursive and cleaning options), use the following Pacman command:
sudo pacman -Rcns postgresqlThis command ensures a thorough cleanup of the system.
Frequently Asked Questions (FAQ) on Arch Linux and PostgreSQL
Q: Why is updating system repositories necessary before installation?
A: Running sudo pacman -Syu synchronizes your local package list with the remote Arch repositories and upgrades any outdated packages. This prevents potential dependency conflicts and ensures you install the latest security-patched version of PostgreSQL and its required libraries.
Q: What is the risk of not enabling data checksums during initialization?
A: Without data checksums, PostgreSQL cannot automatically detect corruption caused by errors at the disk or filesystem level. While it incurs a minor performance overhead, enabling checksums is a standard best practice for production environments to ensure storage-level data integrity.
Q: What is the difference between systemctl start postgresql and systemctl enable postgresql?
A: start runs the service immediately in the current session. enable configures systemd to start the service automatically every time the system boots up. You typically run both: start once now, and enable to make it persistent.
Posting Komentar untuk "The Definitive Guide to Installing and Configuring PostgreSQL on Arch Linux (2025 Model)"